How to set up a VPN on Mac OS
Firstly, you’ll need these credentials to be able to connect
- Username (also known as ‘Account Name’)
- Password
- Shared Secret (this is just another password)
- Server Address (will be either a URL or an IP address)
Already set up? Modifying an existing VPN (this bit not done yet)
Setting up a new VPN
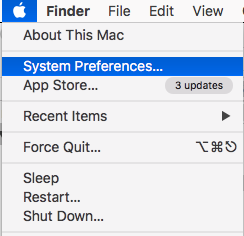
Go to System Preferences/ Network
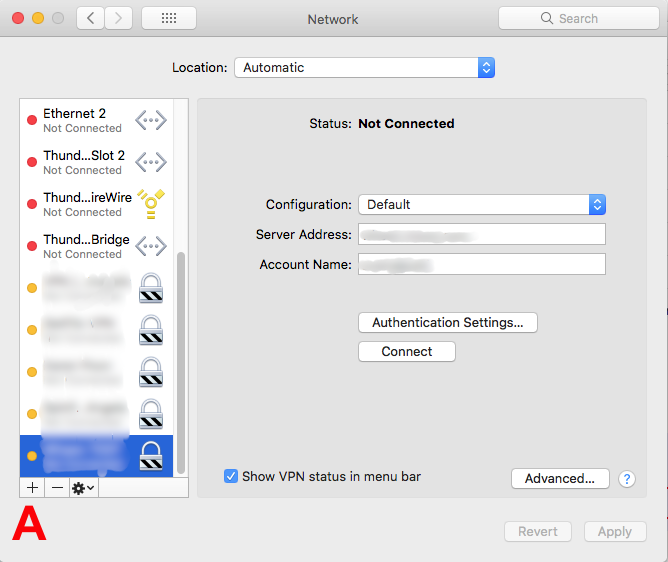
Click on the ‘+’ symbol the the bottom of the window A
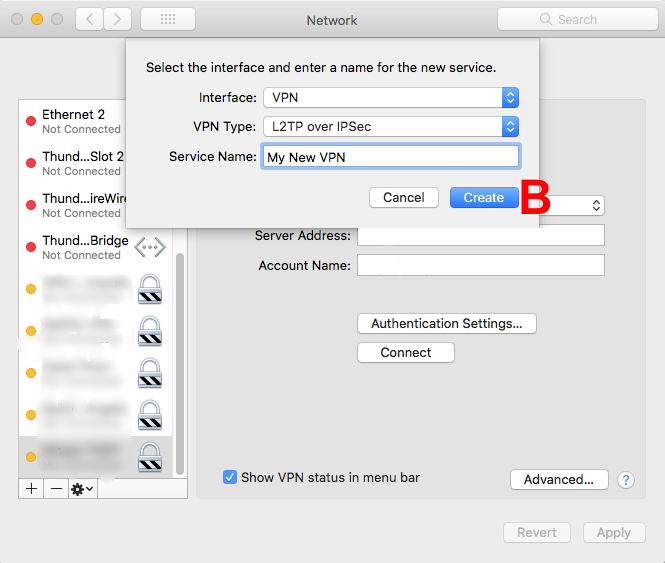
From the list select
Interface- VPN
VPN Type L2TP over IPSEC
Service Name – choose a memorable name for your VPN
Click ‘Create’ B
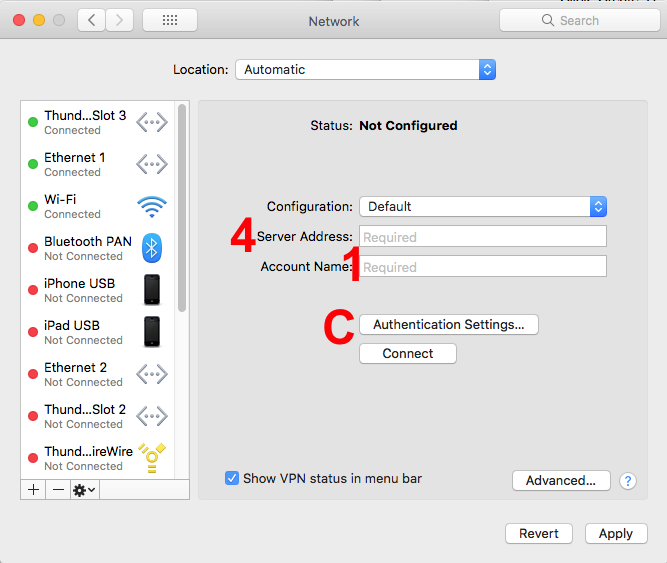
Add your ‘Server Address’ 4 and ‘Account Name’ 1
then click ‘Authentication Settings’ C
On the next screen add your ‘Password’ 2 and ‘Shared Secret’ 3
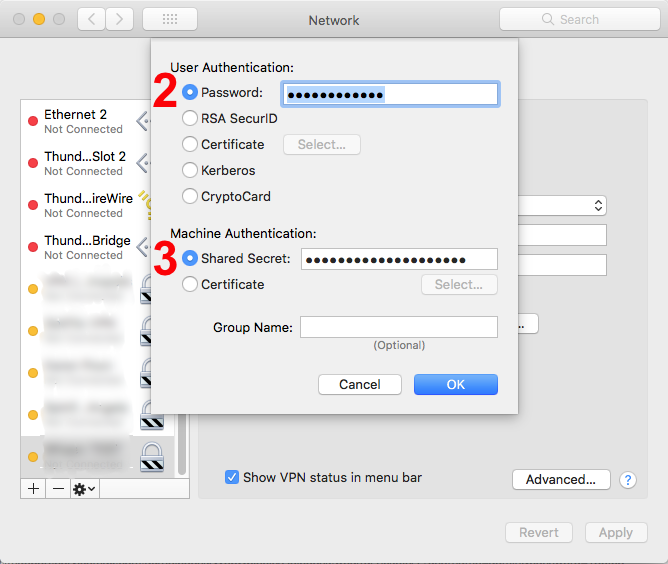
Click ‘OK’, then make sure ‘Show VPN status in menu bar’ D is ticked, then ’Apply’ E
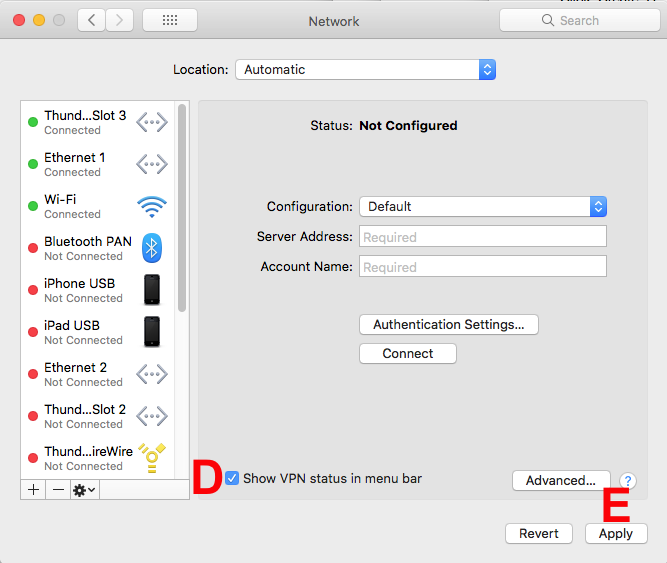
You should now be able to go to the VPN icon in your top menu bar and click the name of your connection and it will connect you to your remote network
NOTE- this won’t usually work if you are currently on the network that you want to connect to, it will only be useful when you are outside the network.

