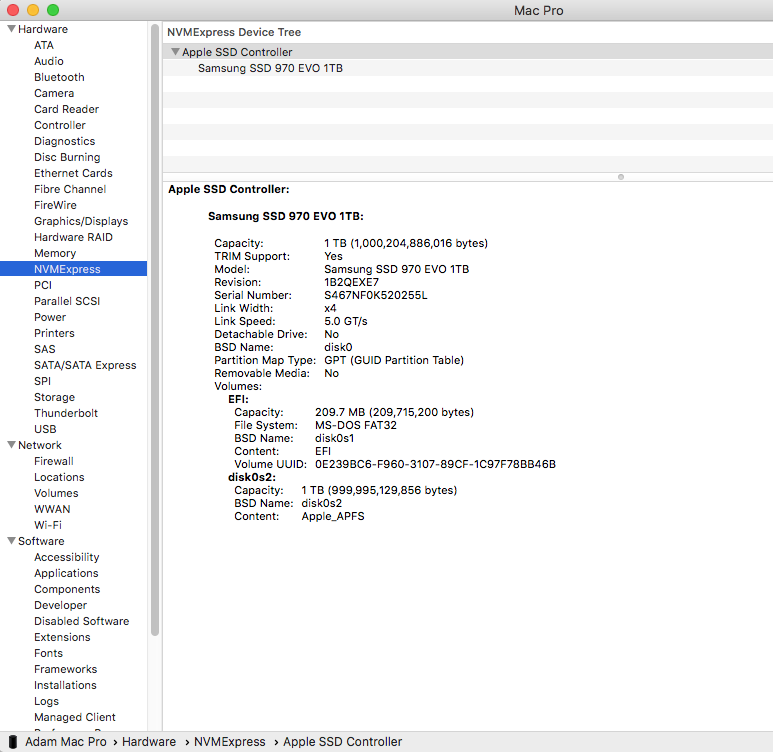
First some background- the ‘trash can’ Mac Pro from 2013 has not been upgraded much over the years. In fact the only thing that I can remember is that the internal SSDs basically doubled in speed very early on. Early versions had around 800MB/s transfer, but soon after launch these went to a version that could transfer ~1500MB/s.
I’m lucky enough to have one of the faster versions, but it was still a 256GB part, and I was constantly running out of space. To the point where I had to move both my iTunes library and my Photos to NAS based storage.
Interestingly, a Chinese company called SinTech produced an adaptor that would adapt the Apple specific pinouts to standard M2 2280 type SSDs. The only problem here is that the Mac Pro requires an AHCI based SSD to be able to start up, despite most machines of similar age being able to use NVMe based SSDs. And of course we discovered this at around the same time that these AHCI based SSDs started to become rare…yup.
So we knew the hardware was technically capable of using an NVMe based SSD, but this was going to require a firmware upgrade from Apple, and based on their history this seemed extremely unlikely.
Guess what? They did it!

Reports started coming in that around firmware v124 that the machines could boot from an NVMe based SSD. But here’s a method that has been tested working- by me!
To use this method, you will need-
a. SinTech adaptor (Version C)
b. SSD Heatsink
c. New NVMe based SSD
d. OWC external casing for your Apple internal SSD
e. Tools
Note- you can do this without the OWC external if you have a Time Machine backup- you could also use a USB based hard drive as a boot drive if you want. I also tried an NVMe external case– these are difficult to get and honestly I’m not all that impressed- an SSD that can do 2500MB/s transfers was maxed out at 320MB/s. Ouch.
- Move some data off your internal drive
- Create a new partition on the internal drive
- Install Mojave on the new partition
- Set up an account and check that the firmware is now 127.0.0.0 (weird huh?)
- Put new SSD in SinTech adaptor, add heatsink
- Shut down Mac Pro, swap drives
- Put Apple SSD in OWC external case
- Boot from Mojave partition on Apple SSD
- Format internal drive
- Copy your data partition from Apple SSD to your new, but internal SSD
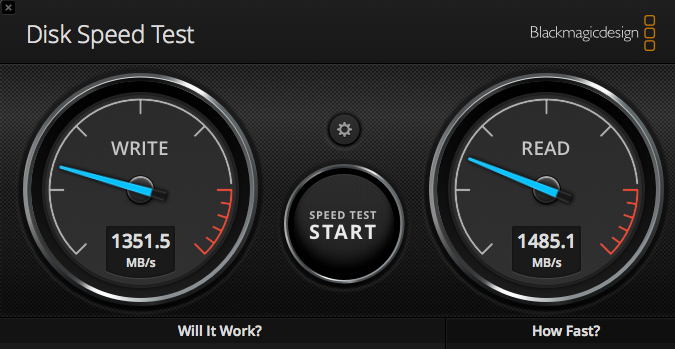
The machine now feels a bit faster (probably due to more space for caching?) and has 4x the built in storage. I tested the throughput with Blackmagic Disk Test and it made around 1350MB/s which is in line with the previous drive, even though it is potentially much faster.
Overall I’m very happy with this upgrade, it cost less than buying a 512MB Apple genuine SSD to fit my machine because I already had all of the tools. Very impressed.


