WARNING- You require a whole bunch of stuff to make this work, including a Public IP address on your VM. Read the requirements carefully to make sure you can meet all of them!
There isn’t anything here that you can’t find elsewhere, but as usual I found that even the manufacturers info was lacking. Linux people seem to have this horror of making complete guides. I’m far from expert but do they really have to make everything so difficult? Do I wake up one day and find that I’ve been granted the Golden Neckbeard? Anyway, on with the show…
cPanel no longer provide full .iso installers, you have to stand up your own OS. I chose CentOS because it’s one I am familiar with, and it’s supported by cPanel- but there’s a lot of work to get it going properly. *You really need to get the partitioning right, because once done, the xfs partitions can’t be shrunk. Here’s a list of those tasks-
- Download CentOS 7 Minimal. Currently no listing for CentOS 8
- Attach the .iso to the Synology and boot
- I chose 2 CPUs, 8GB RAM, no USB, launch on boot
- Set Time Zone, Language, keyboard, software etc.
- DO NOT allow automatic partitioning- What you actually want is 4GB for /swap, 100GB for / and around 15GB spare, so you’ll make the VM about 120GB which will all you to slightly over provision your /
- Turn off security profile
- Click install and set a Root password (remember to change this later)
After a reboot there’s a whole bunch of stuff that still needs doing
Use nmtui to add the VLAN interface that this VM needs to access the internet… (we have to deactivate NetworkManager later)
Deactivate the built in firewall with these commands-
iptables-save > ~/firewall.rulessystemctl stop firewalld.servicesystemctl disable firewalld.service |
Disable Network Manager-
| systemctl stop NetworkManager systemctl disable NetworkManager |
Navigate to /etc/sysconfig/network-scripts and edit each of the interface files. Make sure none of them say NM_CONTROLLED=yes as they won’t work under the new Network settings- yeah I installed nano to do this, don’t hate me. OK I had some issues with nano and used vi
Restart the new Network settings with
| systemctl enable network.service systemctl start network.service |
Next reboot the VM and make sure the networking is ok.
Note- in my case I had added a public IP address using VLAN.50 and couldn’t figure out why it wasn’t working. Turns out I had incorrectly set the IP as a /32 which meant the broadcast address was incorrect. Changing this to the correct /30 fixed the broadcast address and both eth0 and eth0.50 were working at last.
Disable SELinux-
vi /etc/selinux/configChange
SELINUX=enforcing
to
SELINUX=disabled
then save, exit and check with
sestatus
SELinux will probably still be ON, but it will show you the status set by the config file. If that shows OFF, reboot and run sestatus again
Install Perl
fun -y install perl
then you’re ready to install cPanel with
cd /home && curl -o latest -L https://securedownloads.cpanel.net/latest && sh latest
The install takes a while, but if you’ve meticulously followed the setup instructions it seems to work well. At the end of the install it shows some instructions for how to login to your new server via a web browser. It does specify an incredibly long URL that appears to create a one time login for root
I’m not sure if I got it right (that would be a miracle), but I did get to the WHM login screen and was able to log in.
Next tasks were to set Quotas to on, which required a reboot. Then changing the root password to something a little harder to guess and turning on 2-fa and adding it to my Authy credentials store.
Now I can start moving accounts across, but I must have been a bit suspicious about the chances of success- because I’d actually forgotten to change the TTL of the DNS zones beforehand so I can make the transitions smoothly… oops
Done! Or are we?
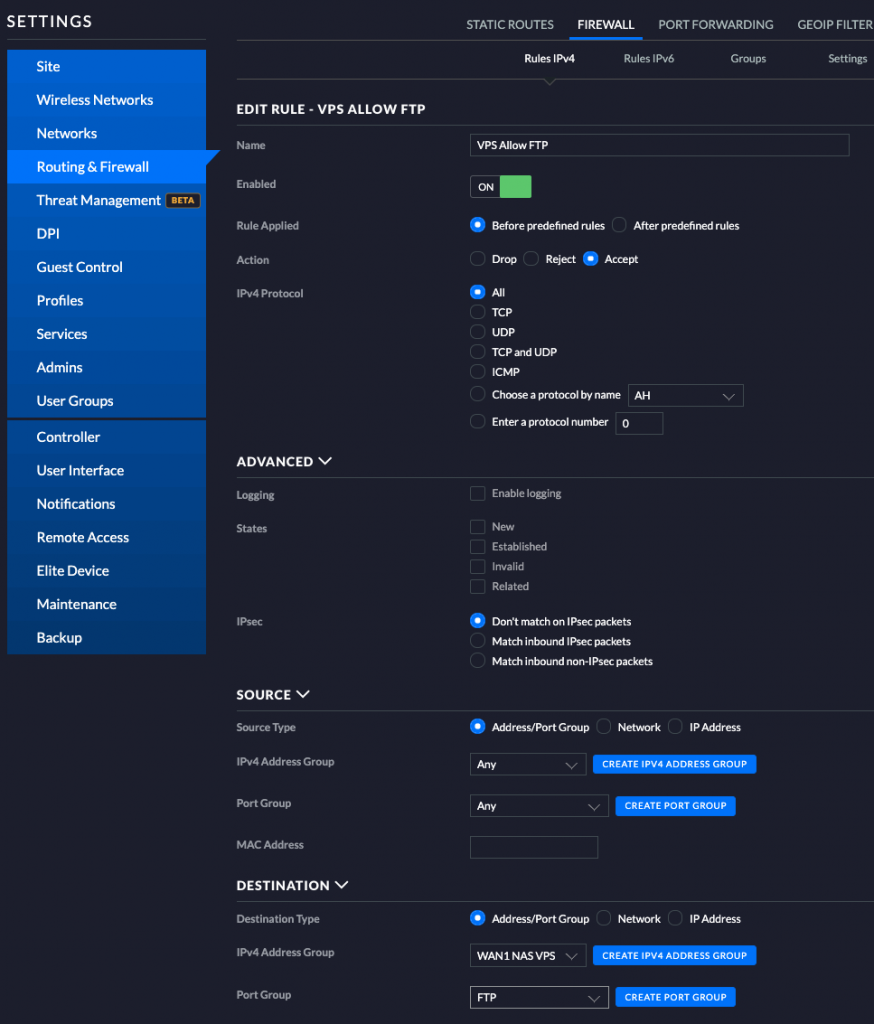
Nope, you actually need to harden your install further. Let’s go back to the router and set up the firewall- better done at the edge of the network than on the Synology which is technically internal.
Go to Routing & Firewall/ Firewall/ Groups and set up a number of groups with the ports numbers as specified here
Then go back to ‘Rules IPv4’ and ‘WAN IN’ and add rules for all of your new Groups. I had 10 groups and 10 rules.

At that point we can disable the rule that allowed any traffic into the VPS VLAN, and test…
Winner! This also has the effect of blocking access to port 5000 on the NAS which was bothering me a lot.
Remember you may also have to configure stuff like csf and Spamexperts etc. to match the config of your old VPS. Don’t forget to set up the Snapshot plan, replication to an external source and offsite backups as well!
My final issue was the fact that people on the internal network where the VM is stored could not access any of the data on that VM. This was obviously an issue because it meant they couldn’t access the Servicemax website, create tickets or otherwise interact with me. And I was planning on moving their email to the VM, not having access could be baaaaad….
After weeks of work, the answer turned out to be simple- This was fixed by creating a new virtual switch and adding the VLAN ID to the correct spot in the setup. Shut down, delete connection to old virtual switch, add new virtual switch and reboot, et voila!

A proper, working WHM/cPanel host on a Synology NAS!

